Getting Started - Setup Pipelines and Opportunities
Organizing your sales pipeline might sound intimidating, but think of it like setting up your workspace for success—everything has a place, and nothing gets lost. With a structured pipeline, you can track leads effortlessly, automate follow-ups, and close deals swiftly. Ready to get your sales organized? Let's dive in!
TABLE OF CONTENTS
Create Sales Pipeline
Import Contacts as Opportunities
Create Opportunity Manually
Create Opportunity by Automation
Create Sales Pipeline
Setting up a new sales pipeline is a breeze, and it helps you visualize exactly where every lead stands in your sales process. Here’s how easy it is to get started:
1. Navigate to Opportunities.
2. Click Pipelines.
3. Click Create New Pipeline..

4. Fill in the details (name, stages, etc.) and click Save
Consider customizing your pipeline stages to match your team's workflow, such as:
New Lead
Hot Lead
Booked Call
No Show
Delayed
Closed
Non-responsive
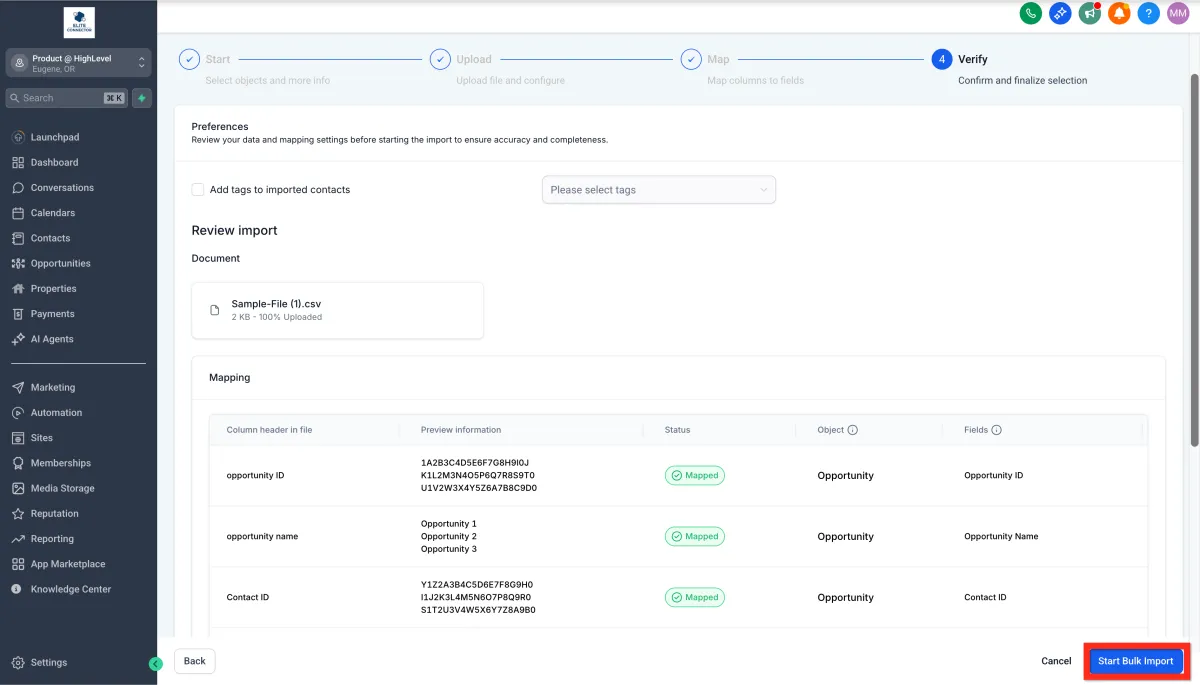
Import Contacts as Opportunities
Got a list of contacts from an event or another platform? Great news—you can easily import them straight into your sales pipeline and turn those leads into opportunities with just a few clicks:
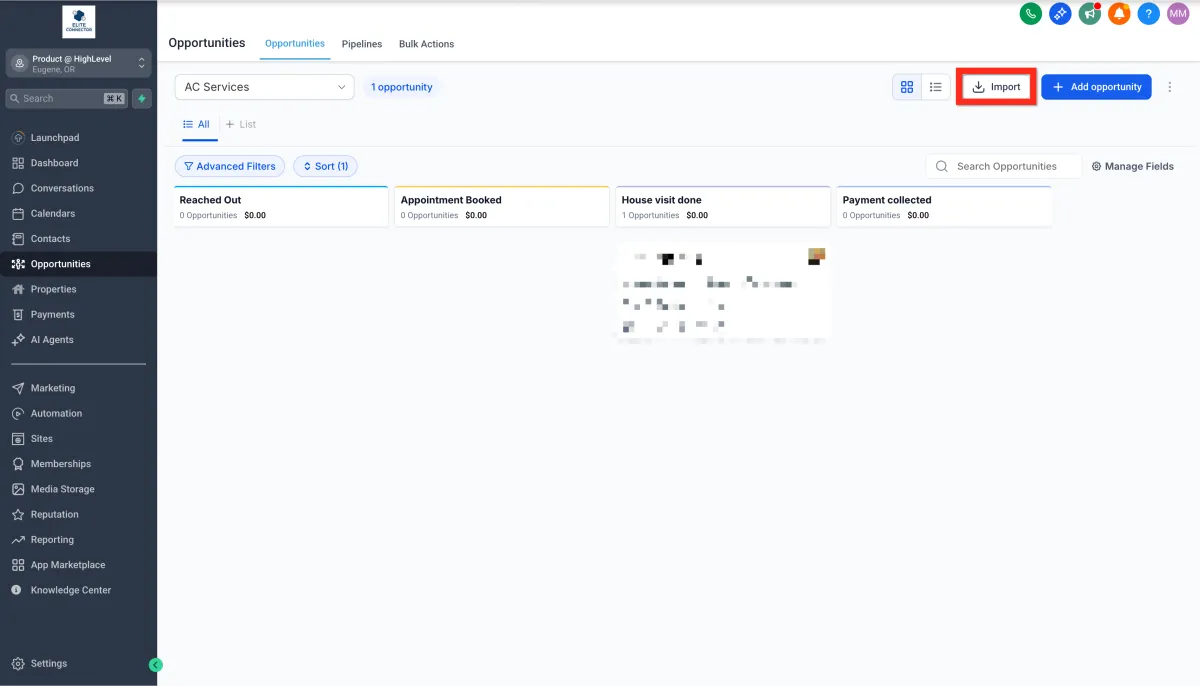
1. Navigate to Opportunities.
2. Click Import..
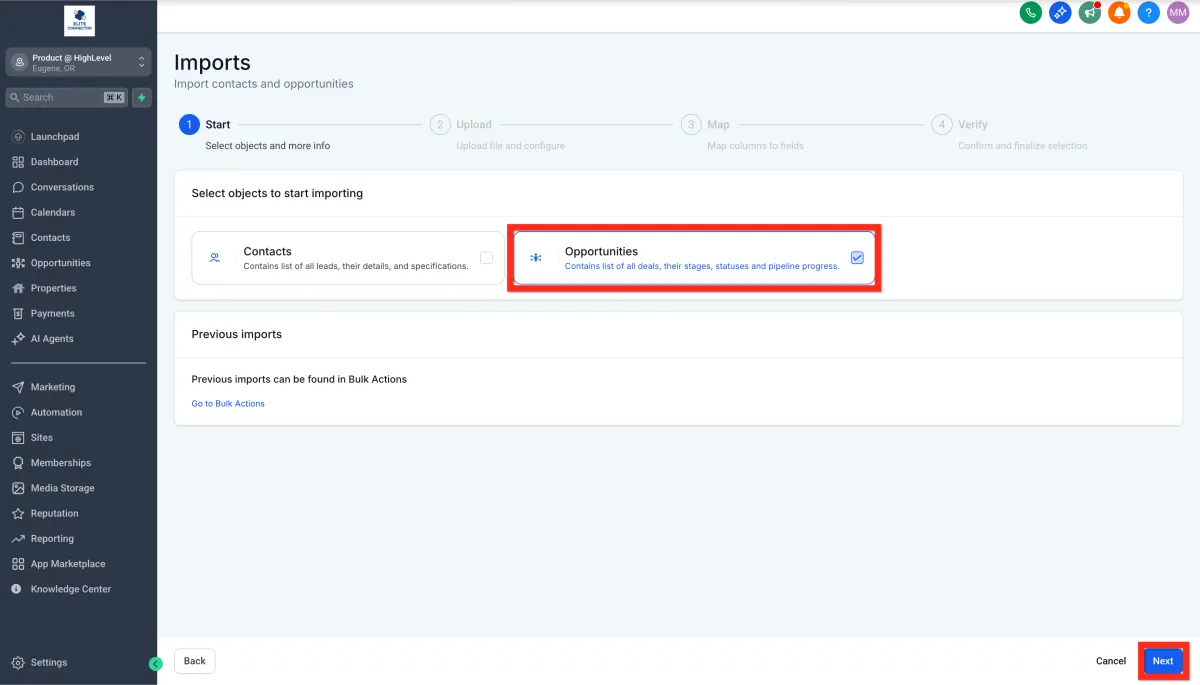
3. Select Opportunities.
4. Click Next.
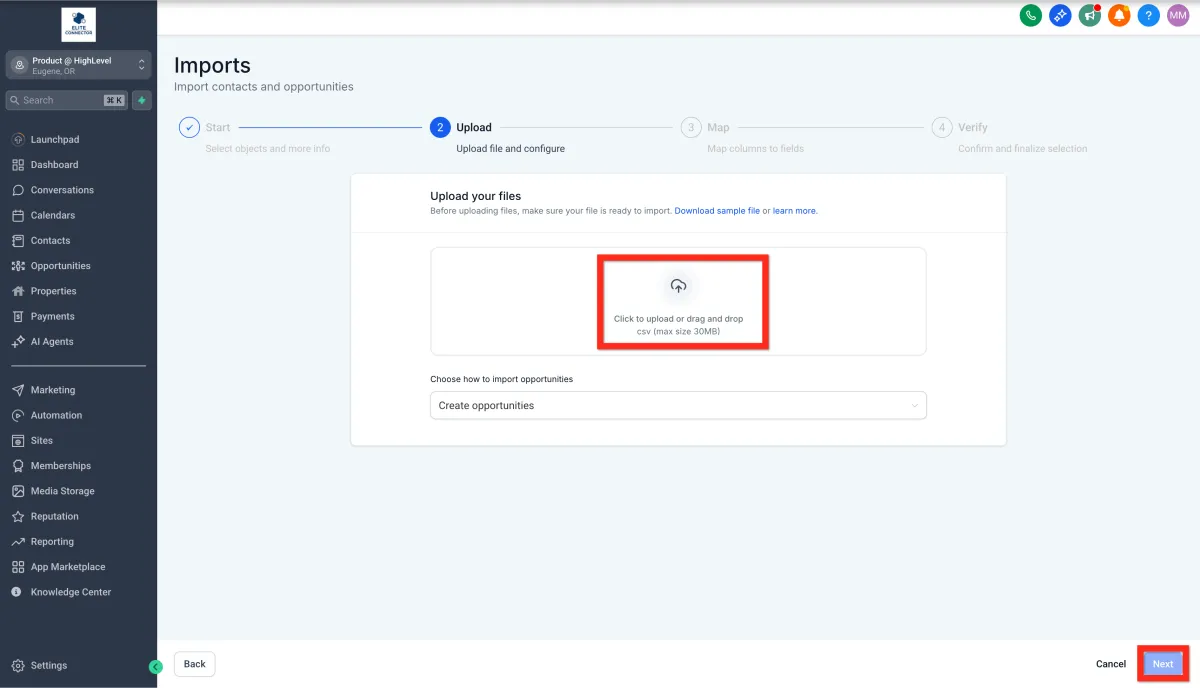
5. Upload your file.
6. Click Next..
7. Map file columns to Opportunity fields.
8. Click Next..

Verify all information and click Start Bulk Import.
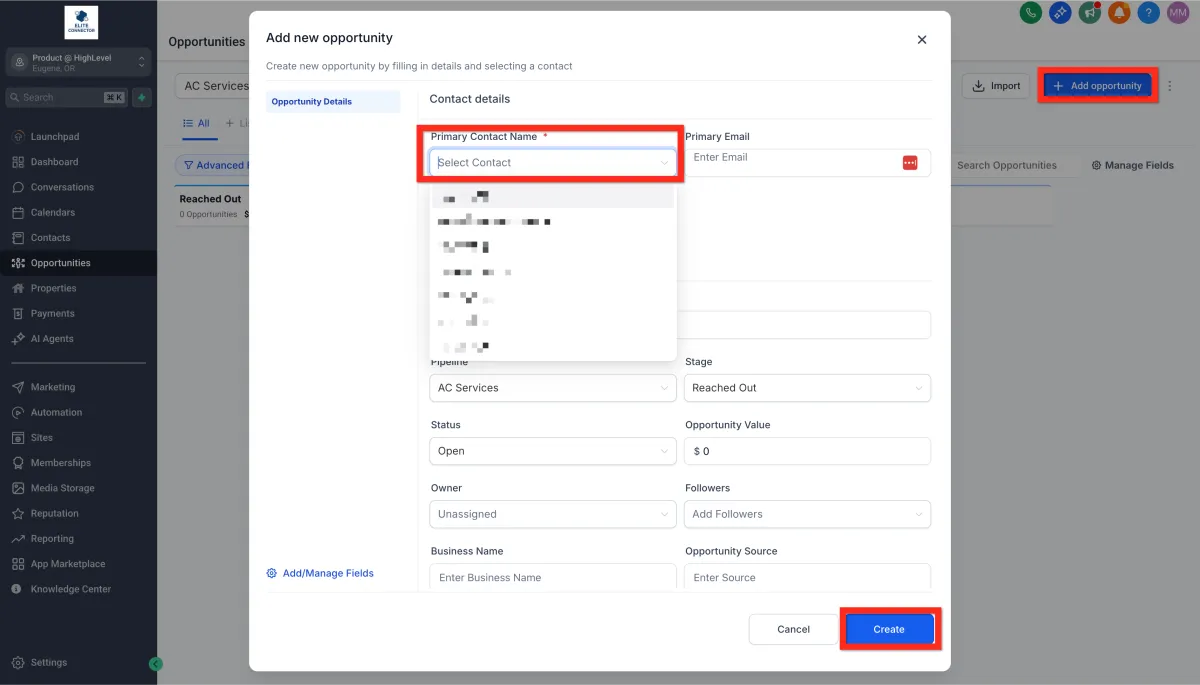
Create Opportunity Manually
Sometimes, opportunities come in one by one, and adding them manually gives you precise control. Plus, it's quick and intuitive! Here’s how you do it:
1. Navigate to Opportunities.
2. Click Add opportunity.
3Select an existing contact or enter details for a new contact.
4. Fill in the Opportunity details (pipeline name, stage, value, etc.).
5. Click Create...
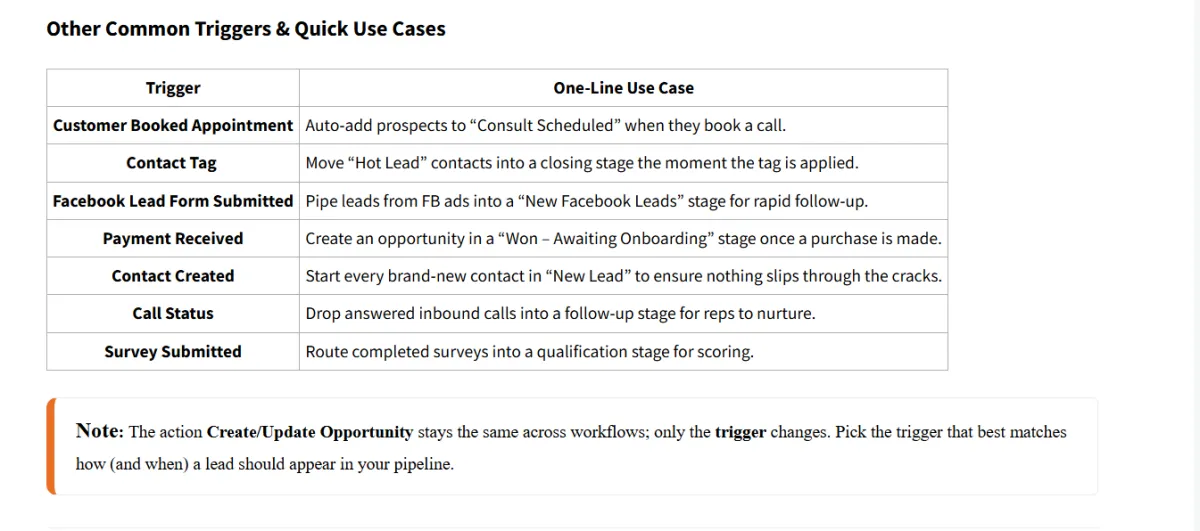
Create Opportunity by Automation
Automating opportunity creation keeps your pipeline tidy without the extra clicks. Below is a quick-start example that fires whenever someone submits a form—followed by a note on other triggers you can swap in.
Open Workflows
Go to Automation → Workflows in the left menu.
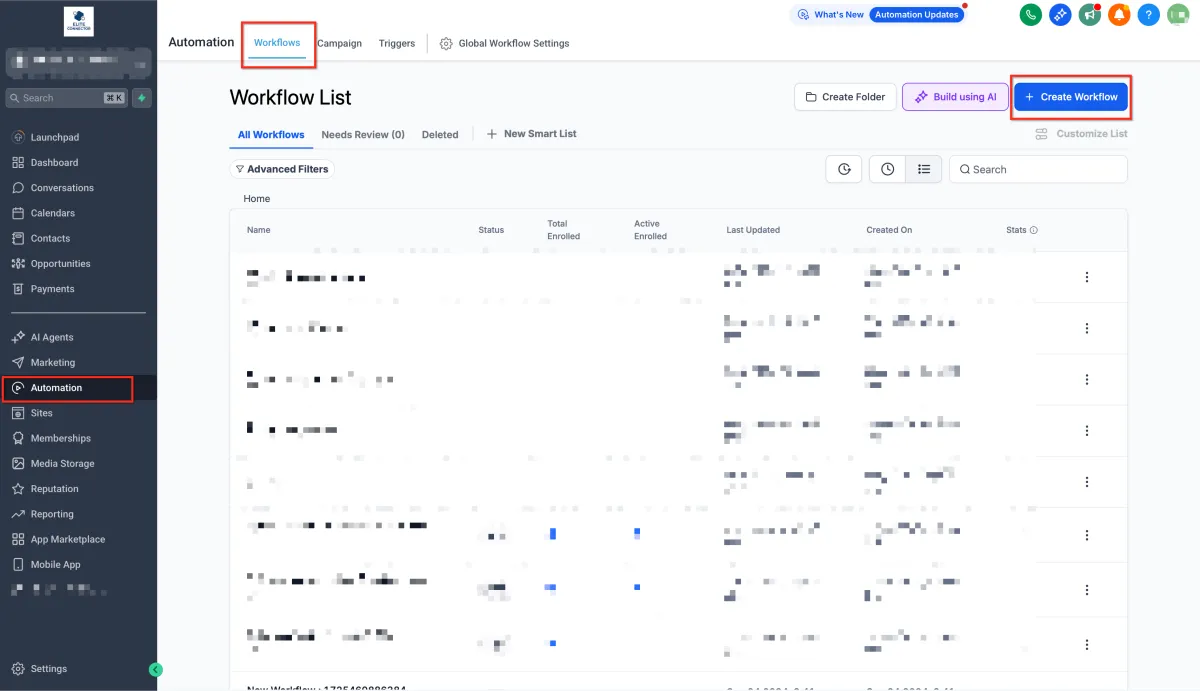
2. Start a New Workflow
Click + Create Workflow → Start from Scratch (or pick a template you want to use).
3.Add a Trigger – Form Submitted
Click + Add New Trigger and choose Form Submitted.
Select the specific form that captures your lead info.
Hit Save Trigger.
4. Add an Action – Create/Update Opportunity
Click + (Add action button) below the trigger, choose Opportunity → Create/Update Opportunity.
Pick the Pipeline and Stage you want new form leads to appear in.
Set Status to Open (or another status), enter a Value if known, and toggle Allow Opportunity to Move if you want the record to update when re-entered later.
Click Save Action

5. Save & Publish
Toggle the Draft → Publish button (top-right). Every future form submission now drops straight into the chosen pipeline stage—hands-free.