
How To Create A Custom Dashboard
Custom widgets and reports are available for the all plans (Unlimited Custom Dashboards).
What are Custom Dashboards?
Custom Dashboards is a configurable analytics space in each sub‑account where you can track KPIs from contacts, appointments, opportunities, calls, revenue, and more. You control the layout, the widgets you add, the metrics they use, and even the dashboard’s look and automated report delivery.
Key Benefits of Custom Dashboards
Multiple Dashboards: Create dedicated dashboards for Sales, Marketing, Finance, or any other team. You can even set one as the default.
Custom Widgets & Metrics: Add, edit, and update metrics with unlimited flexibility to surface the insights that matter most.
Scheduled Reports: Schedule reports at any frequency you choose and deliver them automatically to your team.
Full Customization: Personalize your dashboards with themes, colors, and backgrounds to match your brand.
Deeper Insights: View and analyze data in multiple formats, including tables and other visualizations.
Universal Widgets: Add or remove universal widgets to create a dashboard experience that fits your agency’s workflow.
How to Create Custom Dashboards
Follow these steps to create custom dashboards that match your needs!
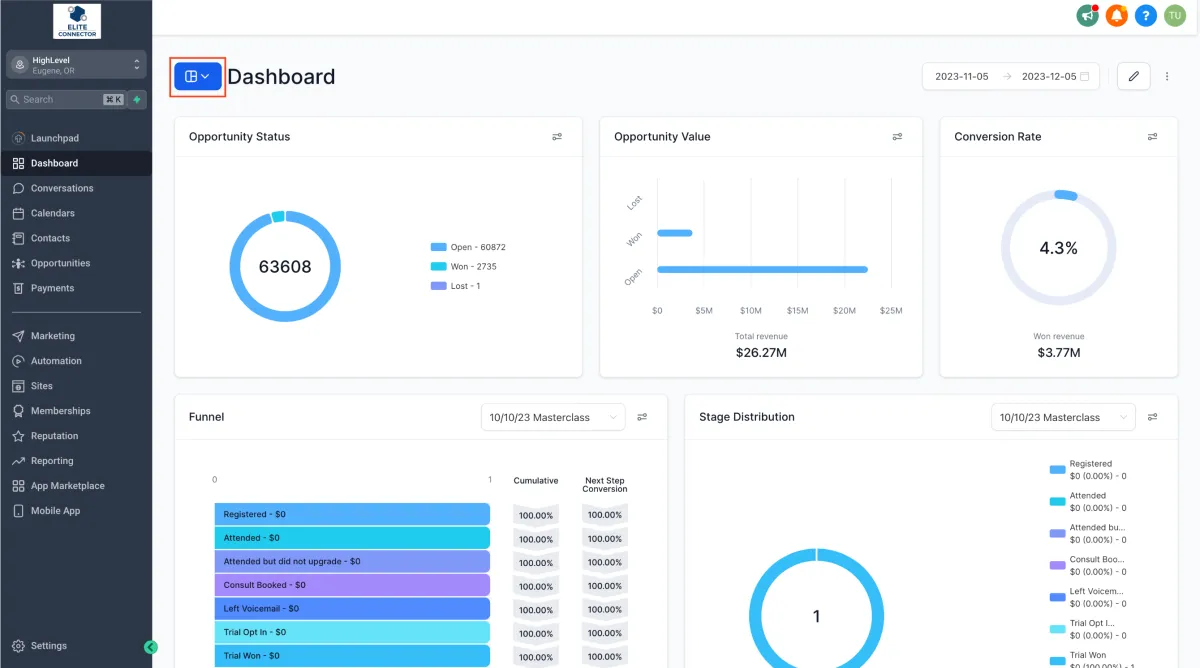
Step 1: Go to the Dashboard Area
Navigate to the Dashboard section within your sub-account.
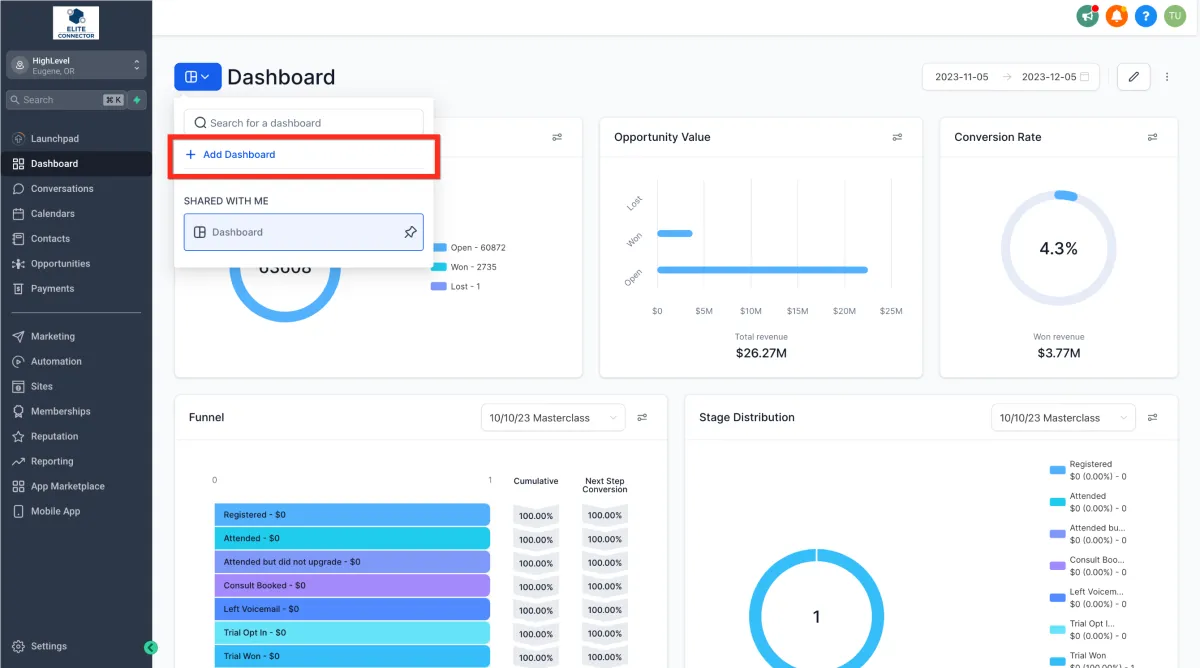
Step 2: Add a New Dashboard
Click the Dashboard Selection Menu and in the dropdown click the "+ Add Dashboard" button.
Note: If you don’t see this button, make sure you're in dashboard view mode.
Step 3: Enter a Dashboard Name
Type a name into the Dashboard Name field.

Step 4: Set Dashboard Permissions
Use the Private Dashboard toggle to control visibility. Turn it ON to make it private, or OFF to allow team access.
If Private Dashboard is turned OFF, set access levels for Agency User, Account Admin, and Account User.
Note: If this toggle is missing, ensure you're still on the "New Dashboard" page.
Step 5: Confirm and Create the Dashboard
Click the "Confirm" button to finalize creation. This will open your new blank dashboard.

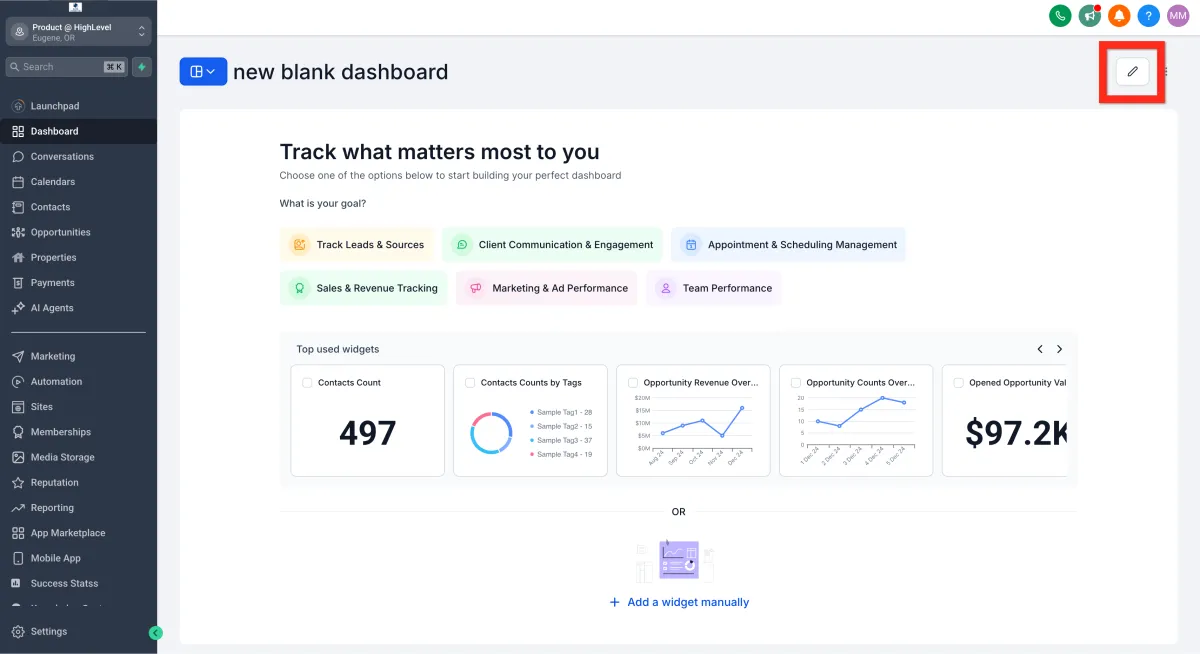
Step 6: Choose How to Add Widgets
After the dashboard is created, you'll arrive at the Quick Start Widgets page. This is the default you always see when a dashboard is blank (no widgets). From here, choose one of the following options:
Option A: Use Suggested Widgets
Use the "What is your goal?" or "Top used widgets" quick start options to select one or more popular widgets. This is what you see whenever a dashboard is empty (no widgets).
Click "Confirm & Add" to quickly insert top-used widgets.
Continue to Step 9.
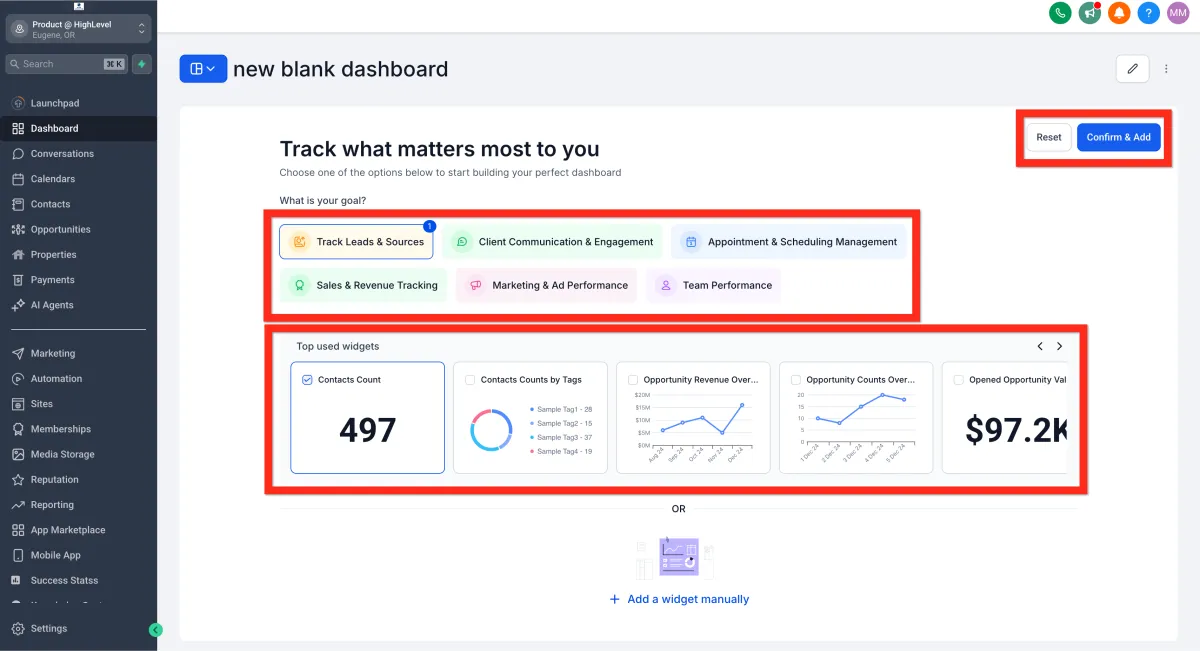
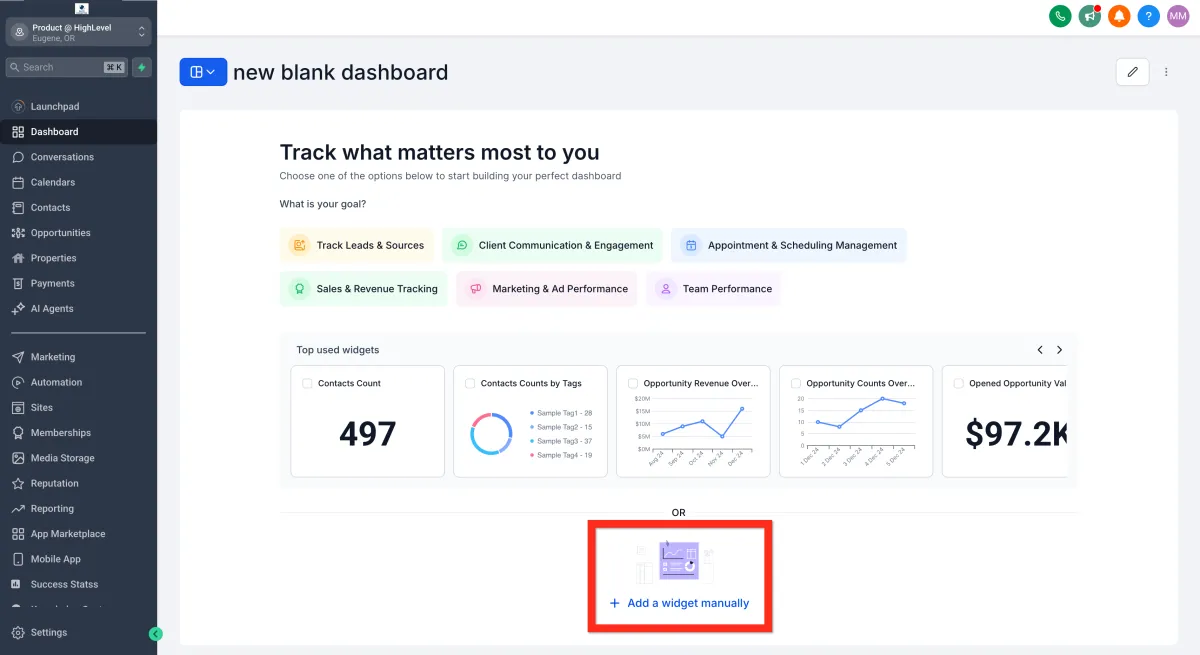
Option B: Manually Add a Widget
Click "+ Add a widget manually" to open the Add New Widget panel.
Proceed to Step 7.
Option C: Add a Widget in Edit Mode
Click the Edit button (pencil icon) and then click "+ Add Widget" from edit mode.
Note: If you don’t see this button, make sure you have entered edit mode.
Proceed to Step 7.
Step 7: Configure a New Widget
Use the Add New Widget panel to define your widget settings.

Step 8: Save the Widget
Click the "Save" button within the widget panel.

Step 9: Save Dashboard Edits
Click the "✓ Save Changes" button to finish. This saves your layout and exits edit mode.

Frequently Asked Questions
Q: Which plans include Custom Dashboards and Custom Reports?
All HighLevel plans ($97, $297, and $497) include multiple dashboards and custom reports.
Q: What chart types are available?
Widgets support several chart types such as scorecards, time series, bar/column, donut/pie, and tables. Availability varies by widget.
Q: Can I send reports to non‑users (e.g., clients)?
Yes. Add any valid email address in Recipients.
Q: Can I duplicate a dashboard?
Yes. Use the dashboard actions to duplicate and then adjust widgets, filters, and themes.