
How To Create A Custom Dashboard
Dashboards can be private to their creator, or they can be shared with different roles at different access levels.
TABLE OF CONTENTS
What Are Dashboard Permissions?
Manage Dashboard Permissions
Set Permissions On A New Dashboard
Step 1: Add A Dashboard
Step 2: Select Blank Dashboard
Step 3: Set Permissions and Save
Set Permissions On An Existing Dashboard
Step 1: Action Manage Permissions
Step 2: Set Permissions and Save
Agency vs Account Views
Agency View Of Dashboard Permissions
Account View Of Dashboard Permissions
Roles and Permissions Hierarchy
What's Next:
What Are Dashboard Permissions?
Dashboards offer the following levels of permissions:
Level
Description
FULL
Gives the person the ability to edit a dashboard and the widgets. The person isn't able to delete the dashboard.
VIEW
Gives the person read-only access to a Dashboard
NO ACCESS
Restricts access to the dashboard entirely
Here are how different actions on dashboards work for different level of permissions
FULL
EDIT
VIEW
NO ACCESS
PRIVATE DASHBOARD
OWNER
Manage Permissions
✅
❌
❌
❌
❌
✅
Delete Dashboard
✅
❌
❌
❌
❌
✅
Set as Default Dashboard
✅
❌
❌
❌
❌
✅
Edit Dashboard
✅
✅
❌
❌
❌
✅
Clone Dashboard
✅
✅
❌
❌
❌
✅
View Dashboard
✅
✅
✅
❌
❌
✅
Duplicate to another Sub-Account (Only Agency Level)
✅
✅
✅
❌
❌
✅
Only dashboard Owners or roles with Full permission are able to edit a dashboard's permissions. Agency Admins always have Full access to all non-private dashboards. Only Account Admin or Agency roles with full access to a dashboard are able to set it as a default dashboard.
Only Agency roles are able to duplicate a dashboard to another subaccount.
Manage Dashboard Permissions
Set Permissions On A New Dashboard
Step 1: Add A Dashboard
Navigate to Dashboard, click on the Dashboard Selection menu (blue), then click on Add Dashboard.
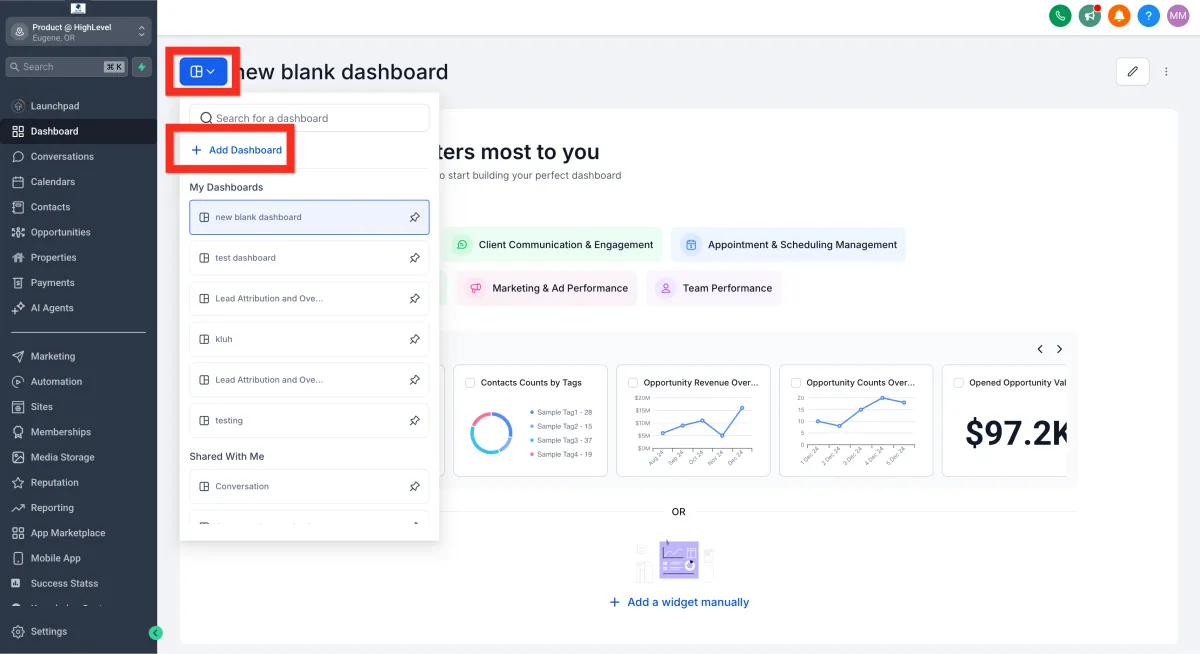
Step 2: Select Blank Dashboard
Under Create a Blank Dashboard, click Select.

Step 3: Set Permissions and Save
On the New Dashboard modal, leave the dashboard private, or turn that off to access sharing permissions. When you are happy with the settings, click Confirm to create the new dashboard with those permissions.

Set Permissions On An Existing Dashboard
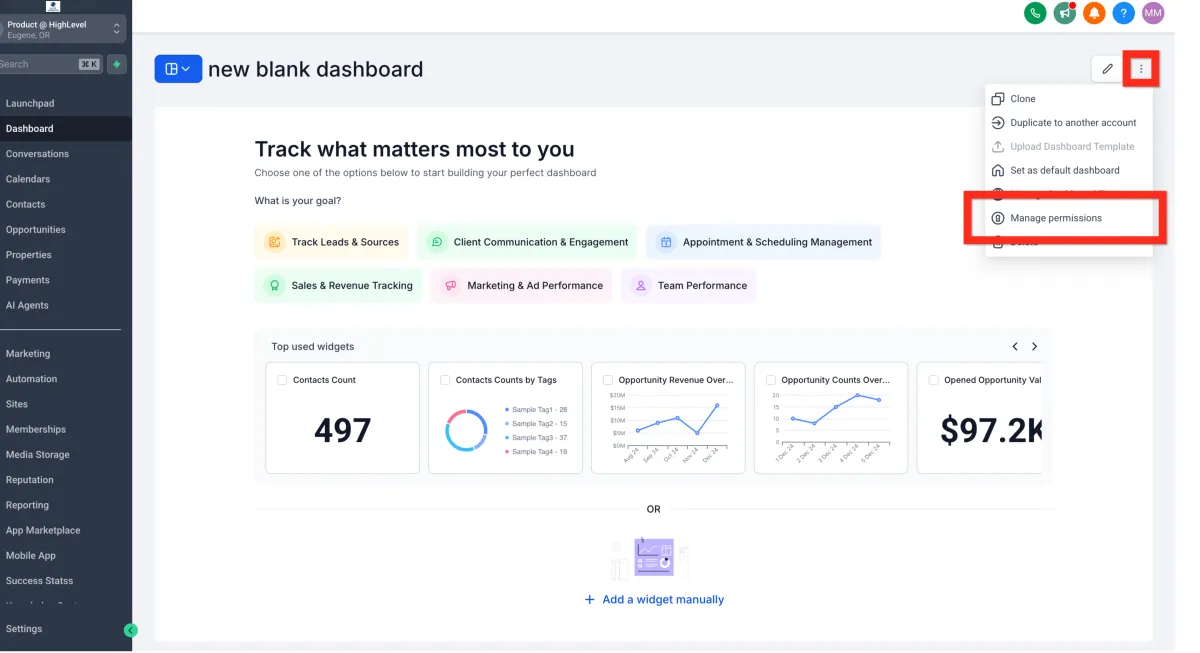
Step 1: Action Manage Permissions
On your existing dashboard, click the 3-dot "action menu", then click Manage Permissions.
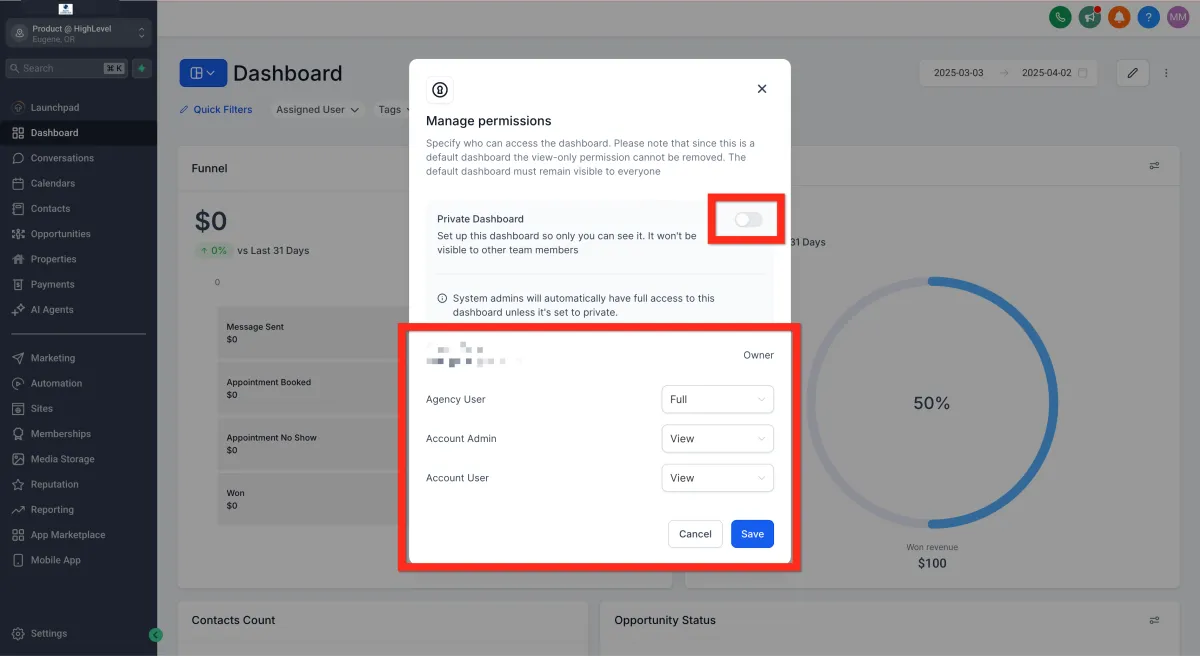
Step 2: Set Permissions and Save
Use the Private toggle to switch between private (only yourself) or sharing permissions.
When you are satisfied with your permissions changes, click Save to close the modal and return to the dashboard.
Agency vs Account Views
Permissions screen and options changes as per the role of the logged in user
Account View Of Dashboard Permissions
In the Account view there are two roles with access settings: Account Admin and Account User.

Account View Of Dashboard Permissions
In the Account view there are two roles with access settings: Account Admin and Account User.
Roles and Permissions Hierarchy
Dashboard Permissions follow a clear hierarchy to ensure smooth management of access levels:
Agency Admins > Agency Users > Account Admins > Account Users.
Permissions for higher-level roles will override permissions for lower-level roles. Lower-level roles cannot posess higher permissions than higher-level roles.
For example, if a dashboard is set to Account Admin:Edit and Account User:Edit is changed to Account Admin:View, then Account User will be automatically changed to View as well.
Frequently Asked Questions
Q: What happens if no permissions are set?
By default, dashboards are visible to all users unless restricted.
Q: What does "Only Assigned Data" restrict exactly?
It filters dashboard widgets to only show data related to the user's assigned records (contacts, opportunities, etc.).
Q: How do I remove a user or role from a dashboard?
Re-open the permissions modal for the dashboard and uncheck the user or role.